
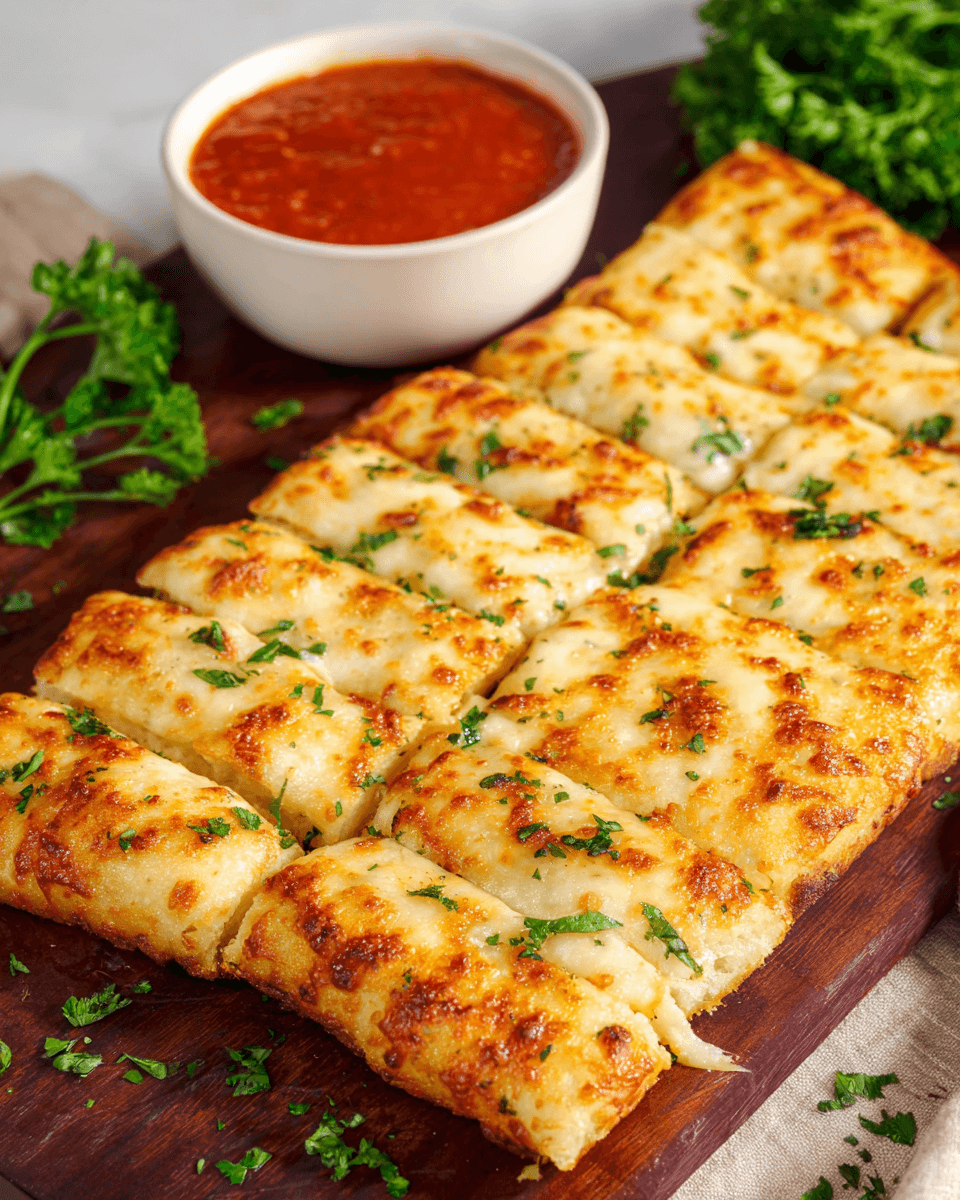
Let me set the scene: it’s a chilly evening, your favorite show is queued up, and all you need is the perfect comfort snack to complete the vibe. That’s exactly where these cheesy garlic breadsticks come in. They’re buttery, golden, outrageously cheesy, and honestly—once you pull them out of the oven and that garlicky aroma hits you—resistance is futile. Whether you’re feeding your family or just yourself (no shame here), these breadsticks are pure joy in every bite.
I still remember the first time I tried a homemade version. I was craving something doughy and indulgent but didn’t want to order out… again. A quick scroll led me down a rabbit hole of cheesy recipes, and I stumbled on a genius tip from King Arthur Baking about how yeast dough can be way easier than we think. From there, the obsession began. And now? These breadsticks are a weekend staple. Let me show you how to make them your go-to too.
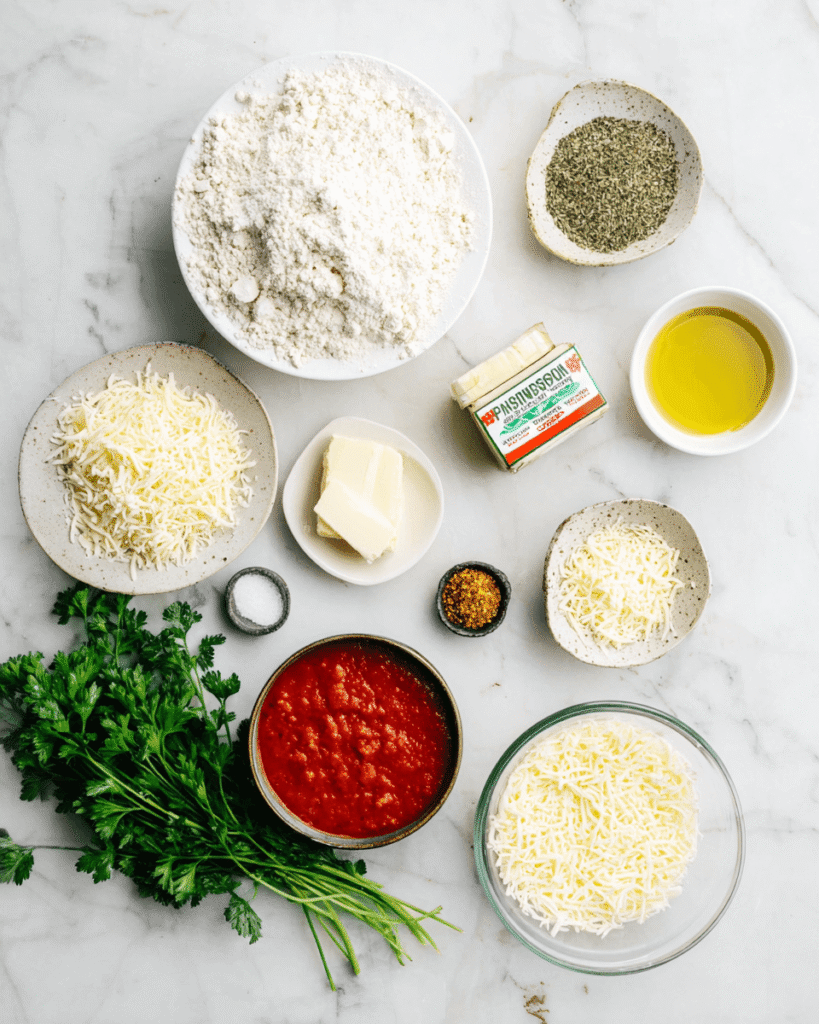
Ingredients You’ll Need (And Why You’ll Love Them)
Here’s everything you need to create the ultimate cheesy garlic breadsticks. I’ve added a few tips so you’ll know exactly what each ingredient does and how to get the best flavor and texture possible.
For the Dough
- All-Purpose Flour – 2 cups
The base of your dough. All-purpose gives just the right balance of chewiness and softness. No need for fancy flours here! - Active Dry Yeast – 1 packet (about 2¼ tsp)
Helps your dough rise and become beautifully airy. Be sure to check that it’s fresh—expired yeast won’t give you that puff. - Warm Water – ¾ cup (about 110°F)
Think “warm bath” temperature. If it’s too hot, it can kill the yeast. If it’s too cold, it won’t activate. - Sugar – 1 tsp
A tiny bit helps feed the yeast and adds a subtle depth of flavor. - Salt – ½ tsp
Enhances the flavor of the dough. Skip this and your breadsticks could fall flat. - Olive Oil – 1 tbsp
Keeps the dough tender and adds a touch of richness. Plus, it helps the crust brown beautifully.
For the Garlic Butter Topping
- Unsalted Butter – ¼ cup (melted)
The base of your garlic topping. Unsalted lets you control the saltiness, especially with cheese involved. - Minced Garlic – 3 cloves (or 1½ tsp jarred)
Fresh is best, but pre-minced works in a pinch. This is where the real magic happens! - Fresh Parsley – 1 tbsp, finely chopped
Adds that little pop of color and freshness on top. Optional, but so pretty. - Salt – a pinch
Just a bit enhances the garlic butter flavor.
For the Cheese Topping
- Shredded Mozzarella – 1½ to 2 cups
The gooier the better. Use whole milk mozzarella if you can—it melts like a dream. - Optional: Grated Parmesan – 2 tbsp
Adds a salty, nutty punch. Highly recommended if you like your cheese with a little edge.
How to Make Cheesy Garlic Breadsticks (Step-by-Step)
This is one of those recipes that looks impressive but is secretly super simple. You’ll go from a ball of dough to bubbling, cheesy perfection in no time—no fancy equipment, no stress. Let’s get into it.
Step 1: Activate the Yeast
In a medium bowl, combine the warm water and sugar, then sprinkle the yeast on top. Give it a gentle stir and let it sit for about 5–10 minutes. You’re looking for a foamy, bubbly top—this means the yeast is alive and ready to work its magic.
Tip: If there’s no foam after 10 minutes, your yeast may be expired. Try again with fresh yeast for best results.
Step 2: Mix the Dough
Add flour, salt, and olive oil to the yeast mixture. Stir with a wooden spoon or spatula until a shaggy dough forms. Then, use your hands to knead it into a smooth, slightly sticky ball. This should take about 3–5 minutes. You can do it right in the bowl—no need to flour your counter unless it’s really sticky.
Step 3: Let It Rise
Cover the bowl with a kitchen towel and let the dough rise in a warm spot for 30–45 minutes, or until it doubles in size. If your kitchen is chilly, place the bowl in your (turned-off) oven with the light on for a cozy little proofing box.
Step 4: Roll It Out
Preheat your oven to 425°F (220°C). Lightly grease a baking sheet or line it with parchment paper. Turn your risen dough out onto the sheet and gently press it into a rectangle—about 9×13 inches. Don’t worry about making it perfect!
Step 5: Make the Garlic Butter
While your oven heats, melt the butter and stir in the minced garlic, parsley, and a pinch of salt. The smell? Unreal.
Step 6: Brush and Cheese It
Brush the entire surface of your dough with the garlic butter—don’t skimp. Then sprinkle your shredded mozzarella all over, covering every edge. Add Parmesan too if you’re using it. The more cheese, the merrier.
Step 7: Bake
Pop your pan into the oven and bake for 12–15 minutes, or until the edges are golden and the cheese is bubbling and just starting to brown in spots. You’ll know it’s ready when the aroma has your whole kitchen smelling like a pizzeria.
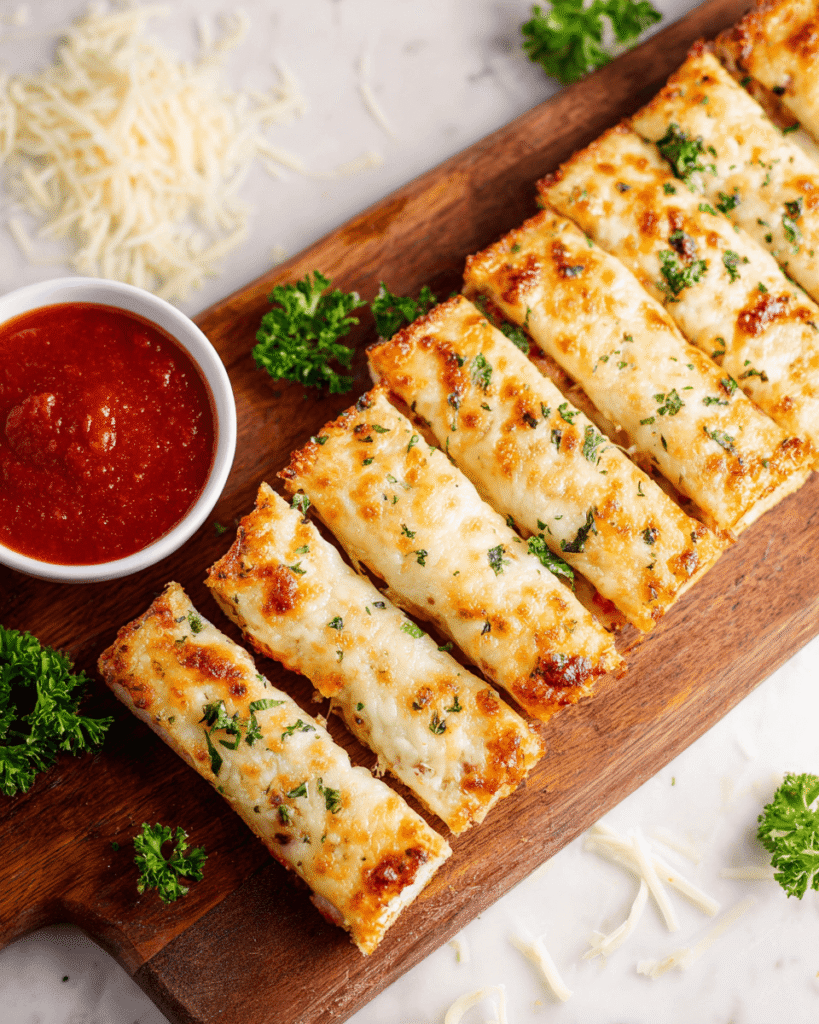
Step 8: Slice and Serve
Let the breadsticks cool for a few minutes (hard, I know), then slice into strips using a pizza cutter or sharp knife. Sprinkle a little more parsley on top if you’re feeling fancy—and serve warm!
Tips & Variations: Make These Breadsticks Your Own
This recipe is super flexible, which makes it perfect for tweaking based on your mood, what’s in your fridge, or who you’re feeding. Here are some smart, easy ways to change things up:
Flavor Swaps You’ll Love
- Cheese Combos
Mozzarella is classic, but you can mix in provolone, gouda, cheddar, or fontina for deeper flavor. Want a spicy kick? Toss in a bit of pepper jack! - Herby Add-Ons
Add dried Italian herbs, crushed red pepper flakes, or a sprinkle of oregano to the garlic butter for a little extra something. - Garlic Upgrade
Roast the garlic before adding it to the butter for a milder, sweeter flavor. It’s worth the extra step for garlic lovers.
Optional Ingredients to Play With
- Chopped Olives or Jalapeños
Sprinkle on top before baking for a fun twist that works especially well for appetizers. - Everything Bagel Seasoning
Want to get fancy? Add a sprinkle of this before baking for that bakery-style finish.
Dough Tweaks
- Make It Whole Wheat
Swap out half the all-purpose flour for whole wheat for a heartier flavor. Just know it’ll be slightly denser. - No Yeast? Try Self-Rising Flour
In a pinch, mix 2 cups self-rising flour with ¾ cup Greek yogurt for a super fast, no-rise dough.
Storage + Reheating Tips
- Leftovers? Store in the fridge
Wrap extras in foil or a container for up to 3 days. Reheat in the oven or toaster oven to keep them crisp (microwaving makes them soft). - Freeze for Later
Let the breadsticks cool completely, wrap individually in foil or plastic wrap, and store in a zip-top bag. They freeze well for up to 2 months. - Reheat Like a Pro
Warm them in a 375°F oven for 8–10 minutes. They’ll taste freshly baked all over again.
Serving Suggestions: Dip, Pair & Share
These cheesy garlic breadsticks are practically begging to be dipped, dunked, and devoured. Here’s how to serve them like a total pro—whether it’s a cozy night in or a crowd-pleasing get-together.
Best Dips for Maximum Flavor
- Marinara Sauce
Classic and always a hit. Warm it up on the stove or in the microwave for that pizza-parlor experience at home. - Ranch Dressing
The cool creaminess of ranch pairs perfectly with the melty cheese and garlic. Kids especially love this combo! - Garlic Aioli or Spicy Mayo
For something a little more grown-up, try a homemade aioli or mix mayo with a dash of hot sauce and lemon juice. - Cheese Sauce
Why stop at one kind of cheese? A warm nacho-style cheese dip takes these breadsticks over the top.
Perfect Pairings
- Soup Night Hero
Serve with tomato soup, creamy potato leek, or minestrone for a satisfying, cozy meal. - Upgrade Your Pasta Game
These make the perfect side for spaghetti, lasagna, or any saucy pasta dish. They’re made for swiping through the last bit of sauce. - Snack Board Star
Add to a game day or party snack board with salami, cheese cubes, fresh fruit, and dips for a more exciting twist on the usual finger foods.
Make It a Meal
Turn it into a simple dinner: just add a fresh salad (Caesar or Italian works great) and a side of roasted veggies. Easy, fast, and everyone’s happy.
Frequently Asked Questions
1. Can I make the dough ahead of time?
Absolutely! After kneading the dough, cover it tightly and refrigerate it for up to 24 hours. Just bring it back to room temperature before rolling it out—it may take 30–45 minutes.
2. What if I don’t have yeast?
You can try a quick no-yeast dough using self-rising flour and Greek yogurt (about 2 cups flour to ¾ cup yogurt). It won’t be quite as fluffy but still tastes amazing and saves time.
3. Can I use pre-shredded cheese?
You can, but if you want that extra gooey melt, freshly shredded cheese is worth the effort. Pre-shredded cheese has anti-caking agents that can make it less melty.
4. How do I keep the breadsticks soft after baking?
Let them cool slightly, then store in a container lined with a paper towel to absorb moisture. Reheat in the oven—not the microwave—for that perfect texture.
5. Can I double the recipe?
Yes! Just double every ingredient and use a larger baking sheet or two. It’s a great idea if you’re serving a group or want leftovers to freeze.
6. Are these freezer-friendly?
Totally. Freeze them after baking and cooling. Wrap each stick tightly and freeze for up to 2 months. Reheat straight from frozen in a 375°F oven for 10–12 minutes.Frequently Asked Questions
1. Can I make the dough ahead of time?
Absolutely! After kneading the dough, cover it tightly and refrigerate it for up to 24 hours. Just bring it back to room temperature before rolling it out—it may take 30–45 minutes.
2. What if I don’t have yeast?
You can try a quick no-yeast dough using self-rising flour and Greek yogurt (about 2 cups flour to ¾ cup yogurt). It won’t be quite as fluffy but still tastes amazing and saves time.
3. Can I use pre-shredded cheese?
You can, but if you want that extra gooey melt, freshly shredded cheese is worth the effort. Pre-shredded cheese has anti-caking agents that can make it less melty.
4. How do I keep the breadsticks soft after baking?
Let them cool slightly, then store in a container lined with a paper towel to absorb moisture. Reheat in the oven—not the microwave—for that perfect texture.
5. Can I double the recipe?
Yes! Just double every ingredient and use a larger baking sheet or two. It’s a great idea if you’re serving a group or want leftovers to freeze.
6. Are these freezer-friendly?
Totally. Freeze them after baking and cooling. Wrap each stick tightly and freeze for up to 2 months. Reheat straight from frozen in a 375°F oven for 10–12 minutes.
Final Thoughts: Your New Go-To Snack Is Here
If you’ve made it this far, you’re officially in cheesy garlic breadstick territory—and honestly, what a delicious place to be. Whether you’re serving these as a side for family dinner, bringing them to a party, or just treating yourself to something warm and buttery after a long day, this recipe delivers every single time.
If you’re looking to build on your baking confidence or want to explore more homemade bread ideas, I highly recommend checking out this Beginner’s Guide to Bread Baking from Sally’s Baking Addiction. It’s full of approachable tips and makes everything feel totally doable—even if you’ve never touched a dough hook in your life.
Now go forth, bake, and enjoy every gooey, garlicky bite. You deserve it.
Print
Mind-Blowing Cheesy Garlic Breadsticks You’ll Want to Make Again and Again
- Total Time: 30 minutes
- Yield: 12 breadsticks 1x
Description
Golden, cheesy, and irresistibly garlicky—these homemade breadsticks are the comfort food you didn’t know you were missing. Perfect as a side dish, appetizer, or stand-alone snack, they come together quickly and are guaranteed to disappear fast.
Ingredients
For the Dough:
2 cups all-purpose flour
1 packet (2¼ tsp) active dry yeast
¾ cup warm water (110°F)
1 tsp sugar
½ tsp salt
1 tbsp olive oil
For the Garlic Butter:
¼ cup unsalted butter, melted
3 cloves garlic, minced
1 tbsp fresh parsley, chopped
Pinch of salt
For the Cheese Topping:
1½ to 2 cups shredded mozzarella
2 tbsp grated Parmesan (optional)
Instructions
In a medium bowl, combine warm water and sugar. Sprinkle yeast over the top, stir gently, and let sit for 5–10 minutes until foamy.
Add flour, salt, and olive oil. Stir until a shaggy dough forms, then knead until smooth (about 3–5 minutes).
Cover and let rise for 30–45 minutes or until doubled in size.
Preheat oven to 425°F (220°C). Line a baking sheet with parchment or lightly grease.
Press dough into a 9×13-inch rectangle on the baking sheet.
Mix melted butter with garlic, parsley, and a pinch of salt. Brush over dough.
Sprinkle with mozzarella and optional Parmesan.
Bake for 12–15 minutes until golden and bubbly.
Cool slightly, then slice into breadsticks and serve warm.
Notes
Freshly shredded mozzarella melts better than pre-shredded.
To store, refrigerate for up to 3 days or freeze for up to 2 months.
Reheat in the oven for the best texture.
- Prep Time: 15 minutes
- Cook Time: 15 minutes
- Category: Appetizer, Side Dish, Snack
- Method: Baking
- Cuisine: American-Italian
Nutrition
- Serving Size: 1 breadstick
- Calories: 180 kcal
- Sugar: 1g
- Sodium: 280mg
- Fat: 8g
- Saturated Fat: 4.5g
- Unsaturated Fat: 3g
- Trans Fat: 0g
- Carbohydrates: 20g
- Fiber: 1g
- Protein: 7g
- Cholesterol: 18mg
Keywords: cheesy garlic breadsticks, easy breadsticks, homemade garlic bread, appetizer recipe