
Whimsy in a Bite: Pistachio & Raspberry Cheesecake Domes
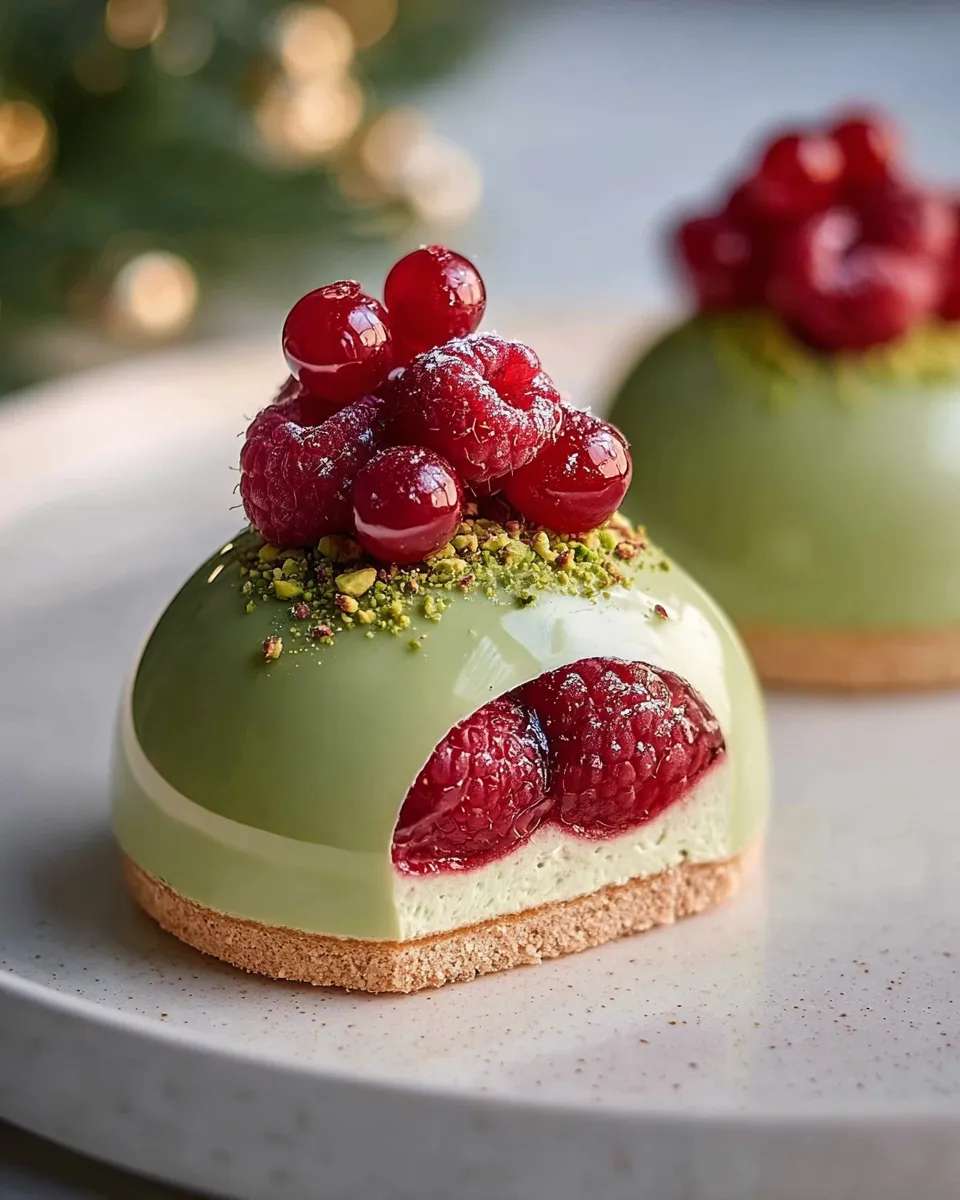
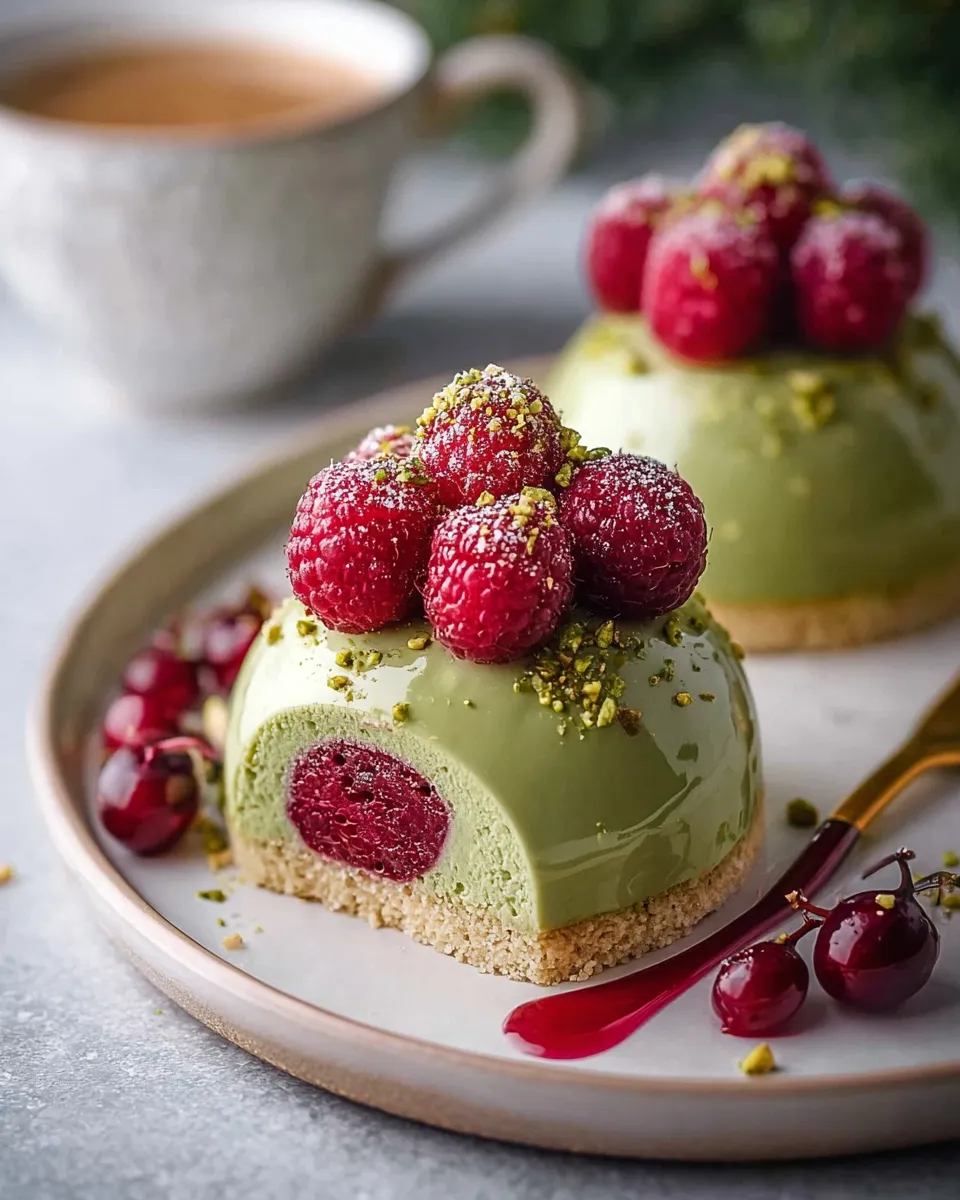
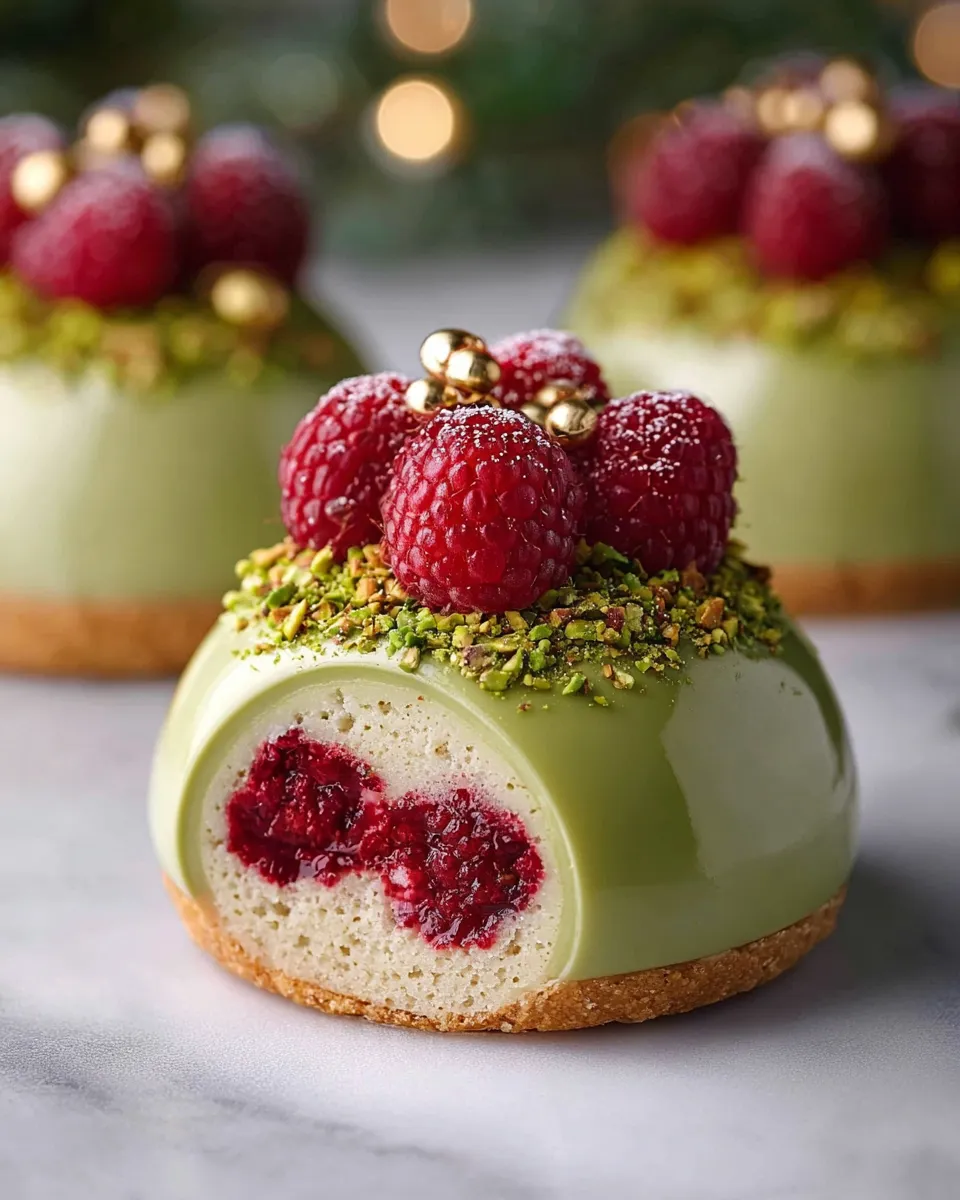
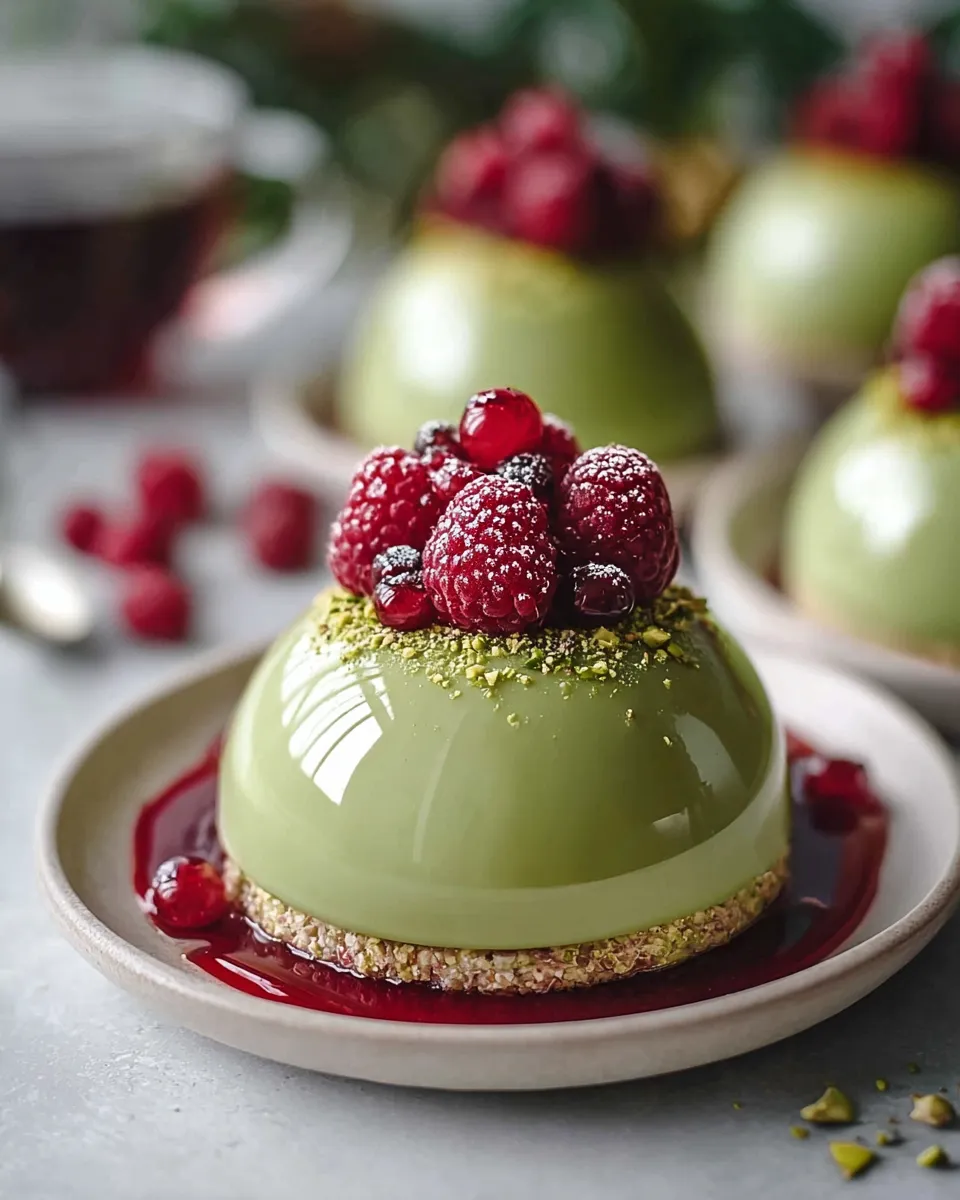
When I crave something fancy but not fussy, I reach for these Pistachio and Raspberry Cheesecake Domes. They feel indulgent with the crunch of pistachio crust and the fruity zing from raspberry, yet they’re light, no-bake, and make-ahead friendly. They photograph beautifully for Pinterest, with their soft green crusts and ruby tops.
Soft, creamy filling pockets sit atop a crisp pistachio crust, while a glossy raspberry layer adds a kiss of tart-sweet brightness. Each bite bursts with texture—crunch, creaminess, and a hint of citrus—all in a perfectly portioned dome. They’re the kind of dessert you can plate in minutes and wow with minimal effort.
Ingredients
- 1 cup digestive biscuits or graham crackers, finely ground into crumbs — for a crisp, sandy crust. Tip: gluten-free crackers work beautifully if needed.
- 2 tablespoons finely chopped pistachios — adds color and a toast of nutty aroma. Tip: reserve a few whole nuts for topping.
- 2 tablespoons unsalted butter, melted — binds the crust and gives it shine.
- 8 oz (225 g) cream cheese, softened — the creamy core every bite relies on.
- 1/3 cup (40 g) powdered sugar, sifted — gentle sweetness that won’t overpower the tang.
- 1 teaspoon pure vanilla extract — builds depth and fragrance.
- 1/2 teaspoon lemon zest — a bright lift that echoes the raspberry topping.
- 1/4 teaspoon fine salt — balances sweetness.
- 2 teaspoons unflavored gelatin powder (or 2 tablespoons hot water to bloom, then 2 tablespoons cold water to dissolve) — helps the raspberry layer set with a clean slice.
- 1/2 cup heavy cream, cold — whipped into a light, fluffy fold for the filling.
- 1/2 cup fresh raspberries — main flavor star for topping and topping accents.
- 1/4 cup raspberry puree or strained puree — intensifies the raspberry flavor and gives a glossy finish.
- 2 tablespoons granulated sugar — balances tartness in the berry layer.
- 1 teaspoon lemon juice — brightens the berry topping.
Instructions
- Make the crust: In a bowl, mix the crushed biscuits, chopped pistachios, sugar, and a pinch of salt. Stir in the melted butter until the mixture clumps when pressed. Press firmly into the bottoms of mini silicone dome molds or a mini muffin tin. Chill in the refrigerator for 20–30 minutes until set and glossy.
- Prepare the filling: Beat the cream cheese with the powdered sugar, vanilla, lemon zest, and salt until completely smooth and creamy. In a separate bowl, whip the cold heavy cream to soft peaks, then fold it gently into the cheese mixture until light and thick.
- Bloom the gelatin: Sprinkle the gelatin over a small amount of hot water and stir until dissolved. Let it cool slightly, then whisk into the filling to ensure an even, silky texture.
- Assemble the domes: Scoop or pipe the filling over the crusts, leaving a small well in the center if you plan to add topping. Smooth the tops and refrigerate while you prepare the raspberry layer.
- Make the raspberry topping: In a small saucepan, combine raspberries, raspberry puree, sugar, and lemon juice. Simmer gently until the mixture thickens and brightens, about 4–6 minutes. Strain to remove seeds for a smooth glaze. If you want a firmer top, whisk in a touch more dissolved gelatin and simmer briefly before cooling.
- Top and chill: Spoon a small amount of the raspberry topping onto each dome and add a few extra raspberries or a sprinkle of crushed pistachios for garnish. Refrigerate at least 1–2 hours (or overnight) to ensure the domes are fully set and slice cleanly.
- Unmold and serve: If you used silicone molds, gently press from the base to release. For a clean cut, run a warm towel around the outside of the mold just before unmolding.
Tips & Variations
- Make ahead magic: Prepare crust, filling, and raspberry topping up to 1 day in advance. Assemble and chill just before serving for the freshest look.
- Gluten-free friendly: Use gluten-free cookies for the crust and ensure any toppings are gluten-free. Cream cheese and gelatin are naturally gluten-free as common choices, but always check labels.
- Vegan or dairy-free option: Swap in a dairy-free cream cheese and a coconut or almond cream for the filling; use agar-agar instead of gelatin and follow package directions for setting the topping.
- Pistachio swaps: Try toasted almond or cashew crumbs for a different nut aroma and color, or simply increase pistachio quantity for a stronger nutty crunch.
- Flavor twists: Add a small drizzle of white chocolate around the edge or a light lemon glaze for extra shine and brightness.
- Texture tips: Chill thoroughly to keep the domes pristine when slicing. If domes stick, briefly dip the mold in warm water to release.
- Storage: Keep domes covered in the fridge for up to 3 days. For longer storage, freeze unassembled crusts and fillings separately, then assemble and thaw in the fridge.
Serving Suggestions
Plate these as a show-stopping dessert plate with a light dusting of powdered sugar, a few fresh raspberries, and a mint leaf for a pop of color. A tiny swirl of extra raspberry coulis around the plate keeps the look restaurant-worthy.
Pair with a simple green salad with citrus vinaigrette between courses to keep the meal balanced, or serve alongside a delicate prosecco or sparkling tea for a brunch-perfect bite.
Make it a dessert duo: pair with tiny pistachio biscotti or almond brittle for added crunch, or serve with citrus-poached pears for a spring-forward finale.
FAQs
Can I make these without gelatin?
Yes, you can use agar-agar as a vegan alternative or leave the topping soft and chill until firm enough. Gelatin gives the cleanest slice, but agar-agar works well when used according to package directions.
How far in advance can I make these?
Crust and filling can be prepared a day ahead. Assemble the domes, chill, then add the raspberry topping right before serving for the freshest look and texture.
Can I freeze these domes?
Yes. Freeze assembled domes for up to a month. Thaw in the fridge overnight before serving. For best texture, garnish with fresh raspberries after thawing.
Can I swap pistachios for another nut?
Absolutely. Almonds, hazelnuts, or walnuts work nicely. Toast the nuts first to deepen the flavor, then chop finely for the crust.
How do I keep the raspberry sauce silky and bright?
Strain the puree to remove seeds, then simmer briefly to reduce and thicken. Cool completely before using. If it thickens too much in the fridge, warm slightly and whisk to loosen.
What if I can’t unmold easily?
Dip the mold in warm water for a few seconds to loosen, then gently press from the bottom or around the edge to release the dome. Make sure the filling is fully set before unmolding.
Final Thoughts
These Pistachio and Raspberry Cheesecake Domes are small in size but big on wow factor. They’re creamy, nutty, and bright all at once, with a texture that pleases every bite. Perfect for Pinterest-worthy parties, bridal showers, or a fancy weekend treat, they prove that you can deliver elegance without hours in the kitchen. Give them a try, then pin the pretty shots and swoon-worthy slices for your next dessert spread.
Print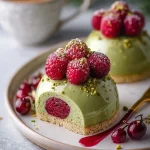
Pistachio Raspberry Domes NoBake Dessert Delights for All
- Total Time: 3 hours
- Yield: 12 servings 1x
Description
Discover pistachio and raspberry cheesecake domes with a creamy nobake finishan easy crowdpleasing recipe that rivals bakery desserts today
Ingredients
Instructions
Notes
No-bake pistachio and raspberry cheesecake domes with a crisp pistachio crust, creamy filling, and a glossy raspberry topping. Make-ahead friendly and perfect for Pinterest-worthy dessert spreads.
- Prep Time: 30 minutes
- Category: Dessert
- Cuisine: American
Nutrition
- Serving Size: 12 servings
- Calories: 250 calories
- Sugar: 14 g
- Fat: 18 g
- Carbohydrates: 20 g
- Fiber: 1 g
- Protein: 5 g
Keywords: pistachio, raspberry, cheesecake domes, no-bake dessert, mini dessert, pistachio crust, raspberry topping