
A Honey-Kissed Welcome to Medovik
When the kitchen fills with the warm glow of honey and the air turns soft with vanilla, I know I’m about to bake a Medovik that tastes like cozy afternoons. This Russian honey cake is all about layers—thin, tender, and whisper-light—with a creamy center that holds the whole dream together.
If you’re new to its charm, don’t worry. We’ll take it step by step, keep the process approachable, and build a dessert that looks extra impressive but feels doable on a busy weekend. Grab a cup of tea, settle in, and let the honey aroma guide you to the first perfectly delicate layer.
Ingredients
- Honey – 1/2 cup. The signature sweetness and moisture that gives Medovik its name. Tip: use floral or light amber honey for a clean, bright honey note.
- Granulated sugar – 1/2 cup. Helps with structure and browning. Swap: coconut sugar for a deeper caramel note, though it may darken the color slightly.
- Eggs – 2 large. Bind the dough and create tender layers. Swap: 1 flax egg per egg for a plant-based option.
- Unsalted butter – 1/2 cup (1 stick), melted. Adds richness and tenderness. Swap: light oil or dairy-free butter for a dairy-free version.
- All-purpose flour – 2 cups, plus more for dusting. The canvas for the delicate layers. Swap: 1-to-1 gluten-free flour blend with a pinch of xanthan gum if needed.
- Baking soda – 1 teaspoon. Reacts with honey to lift the layers just enough.
- Salt – 1/4 teaspoon. Balances sweetness and depth.
- Vanilla extract – 1 teaspoon (optional). Adds aroma that enhances the filling and dough.
- Sour cream – 2 cups (full-fat) for the filling. Creamy, tangy, and keeps the layers from feeling heavy. Swap: Greek yogurt for a thicker tang, or dairy-free sour cream for a dairy-free version.
- Sweetened condensed milk – 1/2 cup for the filling. Adds sweetness and silkiness to the cream. Swap: extra sour cream with a bit more sugar, though the texture will be less luscious.
- Vanilla extract – 1 teaspoon (optional) for the filling. A gentle aroma that bridges the dough and cream.
- Extra honey for brushing (optional) – a light gloss and extra touch of honey flavor on top.
Instructions
- In a small saucepan, warm the honey and sugar together just until the sugar dissolves and the mixture is smooth and glossy. Remove from heat and stir in the melted butter until fully blended.
- Beat in the eggs, one at a time, plus the vanilla. The mixture should look glossy and slightly thickened.
- Whisk in the flour and baking soda until you have a soft, cohesive dough. If it feels too sticky, chill for 20 minutes to make it easier to handle.
- Divide the dough into 8–10 equal portions. Roll each piece between parchment until it’s very thin—about 1/16 inch (2 mm). Keep the rounds roughly the same size so they stack neatly.
- Preheat your oven to 350°F (175°C). Line baking sheets with parchment and transfer rounds onto the sheets. Bake 5–7 minutes, watching for edges to turn light golden and centers to set. Remove and cool completely on a rack.
- If needed, trim the edges of each disc so they’re uniform in size and shape. The edges are often a little ragged; neat discs stack more cleanly.
- Meanwhile, prepare the filling. In a bowl, whisk together sour cream, condensed milk, and vanilla until smooth and silky. Chill briefly if it feels too thick or soft.
- To assemble, place one disc on a serving plate. Spread a thin, even layer of the filling, almost like a veil. Repeat with the remaining discs, layering them into a tall, frosting-slick tower. Press lightly so the layers settle evenly.
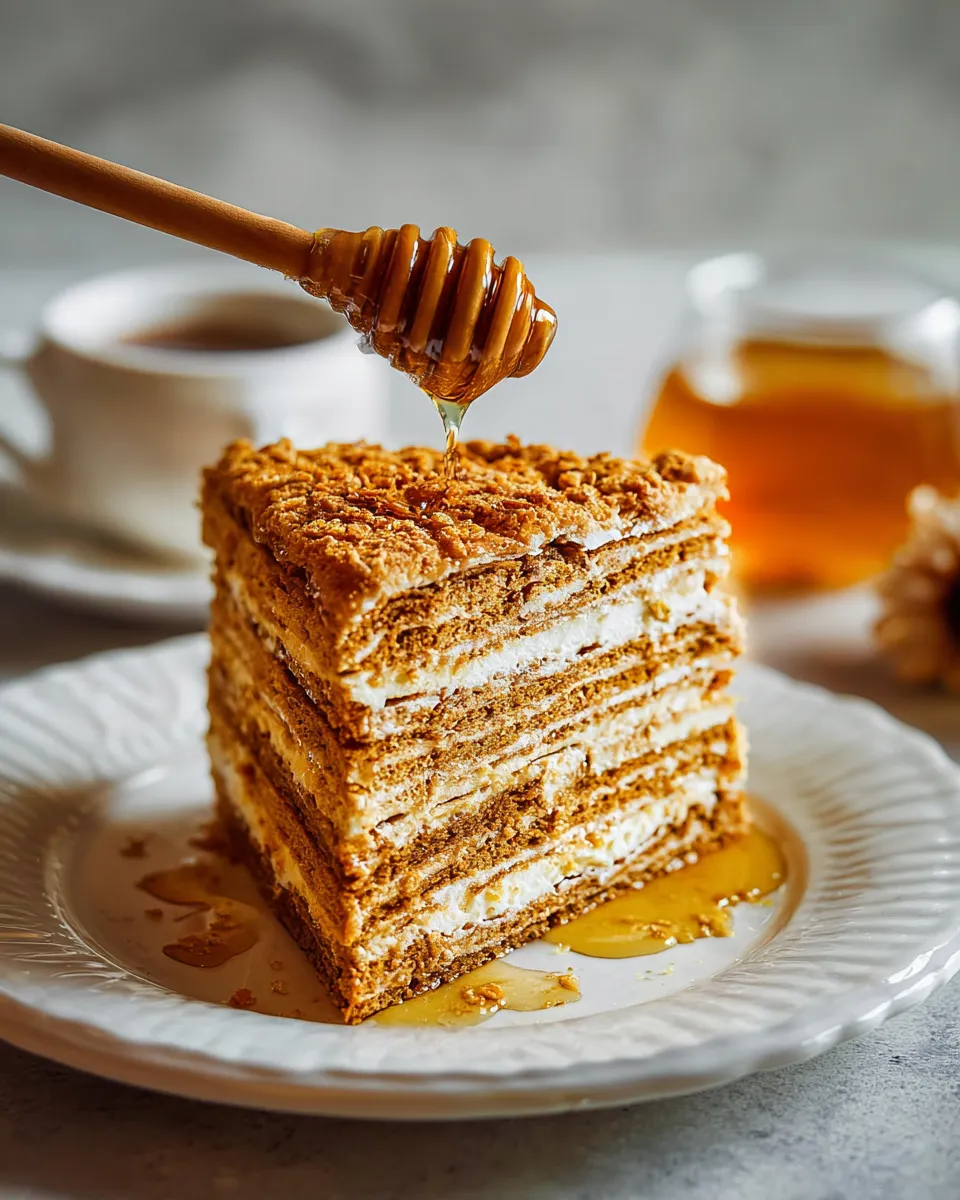
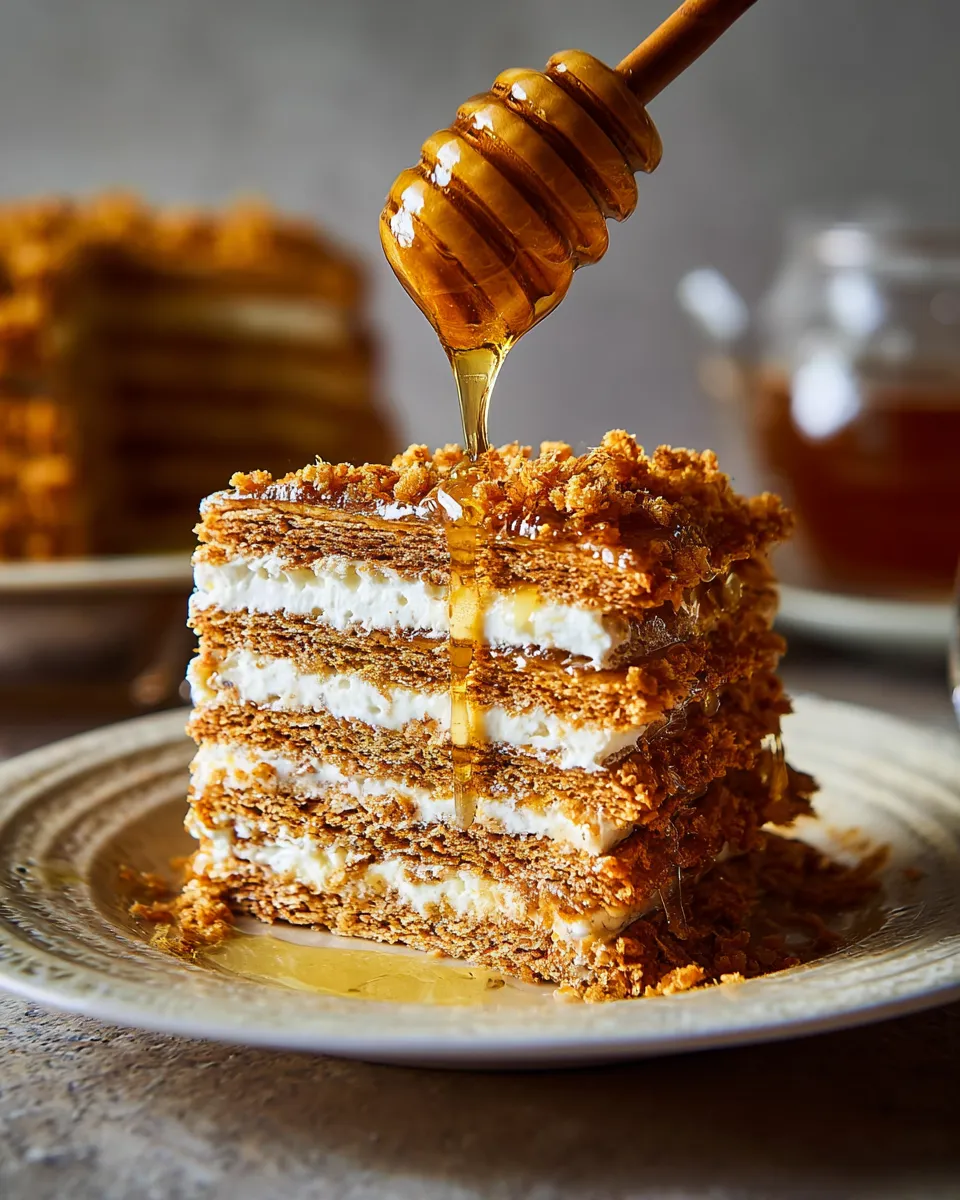
- Spread the remaining filling over the top and sides. The cake should have a clean, creamy finish with visible layers peeking through at the edges.
- Refrigerate for at least 8 hours or preferably overnight. The cake becomes more cohesive as the layers absorb moisture from the cream, and the flavors mellow into a harmonious honeyed bite.
- Before serving, you can brush the top with a touch of honey for shine, and optionally sprinkle chopped nuts for a little crunch.
Tips & Variations
- Texture control: If your dough feels too stiff, add a teaspoon of water or milk to bring it together. If it’s too sticky, chill a bit longer.
- Gluten-free option: Use a 1-to-1 gluten-free flour blend with 1–2 teaspoons extra gelatin or xanthan gum to help mimic structure. Roll very thin for best results.
- Chocolate twist: Add 2 tablespoons of cocoa powder to the dough and reduce flour by the same amount for a chocolate Medovik.
- Citrus brightness: Add a teaspoon of lemon or orange zest to the honey mixture for a refreshing note that pairs beautifully with the tangy filling.
- Dairy-free version: Use dairy-free butter, coconut yogurt or almond yogurt in place of the sour cream, and dairy-free sour cream for the filling. Check labels for thick, cream-like textures.
- Make-ahead strategy: The dough rounds can be baked up to 1 day ahead and stored between parchment in a cool place. The assembled cake can be kept chilled for up to a week.
- Flavor depth: A pinch of ground cinnamon or cardamom in the filling adds warmth without overpowering the honey.
- Nuts and garnish: Toasted crushed pistachios or walnuts on the sides add color and a little crunch that looks gorgeous on Pinterest.
Serving Suggestions
- Pair with a hot cup of black tea or a velvety latte to balance the honey sweetness.
- Serve with a bright fruit salad (orange segments, blueberries, and pomegranate) to cut the richness and add a pop of color.
- Plate slices on a wooden board with a dollop of extra cream and a drizzle of honey for a rustic, photogenic presentation.
- Make it a dessert platter: slice Medovik into bars and serve with yogurt cups and a sprinkle of citrus zest for a lighter tasting menu vibe.
FAQs
Can I make Medovik ahead and refrigerate it before serving?
Yes. Medovik benefits from a sleep-in-the-fridge. Make the layers and the filling ahead, then stack and refrigerate overnight or for up to 2 days. The flavors meld and the texture becomes delightfully cohesive.
How should I store leftovers?
Wrap tightly in plastic wrap or store in an airtight container in the fridge. It will stay delicious for up to 5–7 days. For longer storage, freeze sliced portions for up to 2 months, thaw overnight in the fridge and bring to room temperature before serving.
What if my cream is too thin?
Chill the filling for about 15–20 minutes to thicken. If it’s still soft, fold in a tablespoon or two of whipped cream or beat in a little extra condensed milk. Do not rush; the cake relies on a stable, creamy layer.
Can I make this dairy-free or vegan?
Absolutely. Use dairy-free butter, a thick dairy-free yogurt, and a dairy-free sour cream substitute. For the filling, a coconut yogurt blend with a touch of almond milk can work, but expect a slightly different tang and texture.
Is it possible to adapt Medovik into bars or a sheet cake?
Yes. Roll the dough a bit thinner and bake in large rounds or cut into even sheets after baking. Layer with the cream, chill, and slice into bars for an easy, shareable treat that still captures the signature honey flavor.
What should I do if my edges aren’t even after stacking?
Trim the cooled discs to the same size with a sharp knife or round cutter before layering. This ensures clean lines and a tidy presentation when you slice the cake for serving.
Final Thoughts
Medovik is a celebration of patience, precision, and honey-forward flavor. Each thin layer invites a new bite of creamy sweetness, and the resting time makes the whole cake feel magically cohesive. Give yourself time to rest the layers, and you’ll be rewarded with a dessert that’s as comforting as it is gorgeous—perfect for a special occasion or a weekend coffee ritual.
Print
Delightful Russian Medovik Ultimate Honey Cake Recipe Guide
- Total Time: 9 hours 40 minutes
- Yield: 8–10 servings 1x
Description
Master Russian Medovik with this honey cake guideeasy steps rich flavor and pro tips to bake a bakeryworthy Medovik at home Perfect for gatherings
Ingredients
Instructions
Notes
A Russian honey cake (Medovik) featuring ultra-thin honey layers with a creamy sour cream filling, stacked into a tall, frosting-slick dessert and finished with optional honey glaze and nuts for extra shine and crunch.
- Prep Time: 40 minutes
- Cook Time: 1 hour
- Category: Dessert
- Cuisine: Russian
Nutrition
- Serving Size: 8–10 servings
- Calories: 350 kcal
- Sugar: 28 g
- Fat: 18 g
- Carbohydrates: 50 g
- Fiber: 1 g
- Protein: 6 g
Keywords: Medovik, Russian honey cake, honey cake, layer cake, dessert recipe, traditional Russian dessert, easy Medovik recipe