
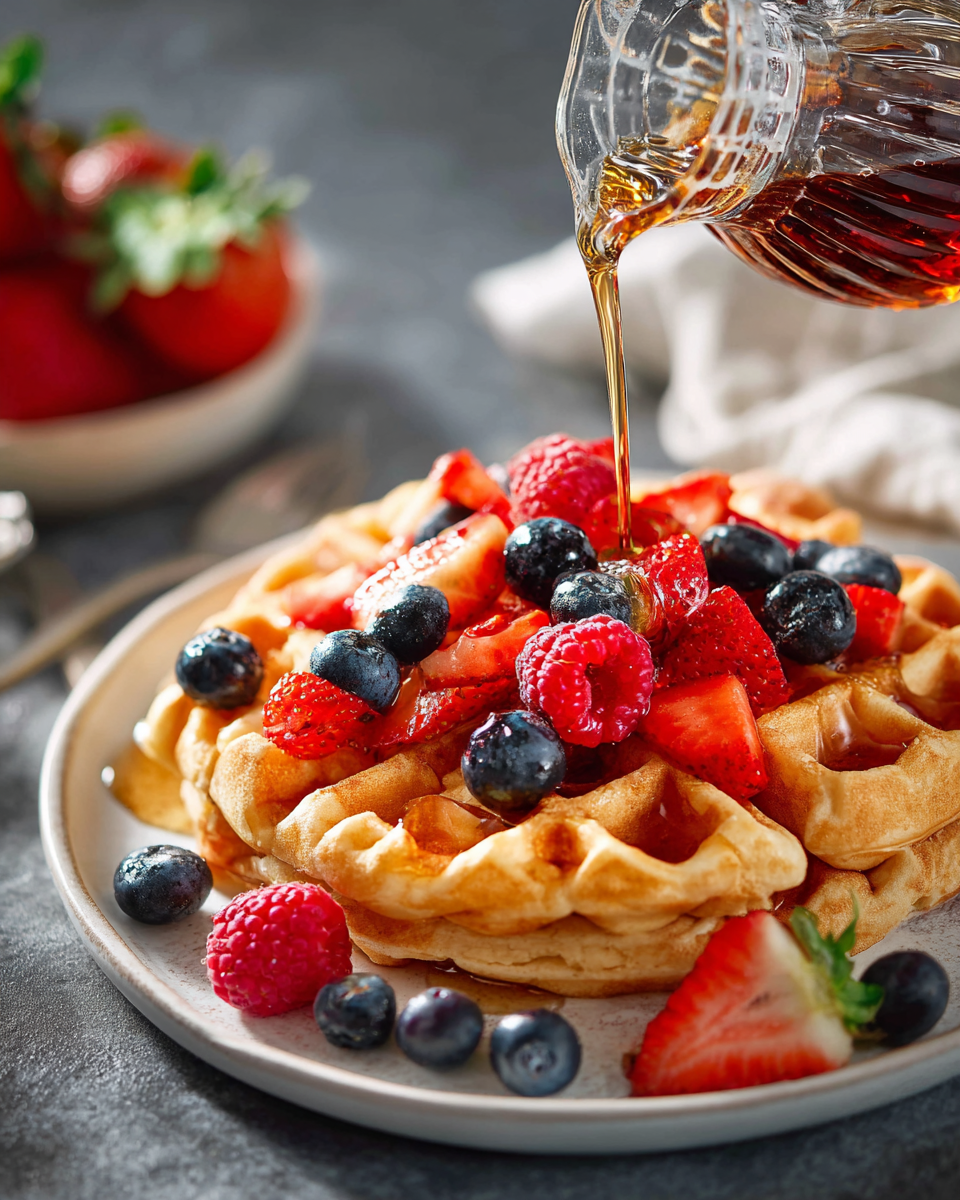
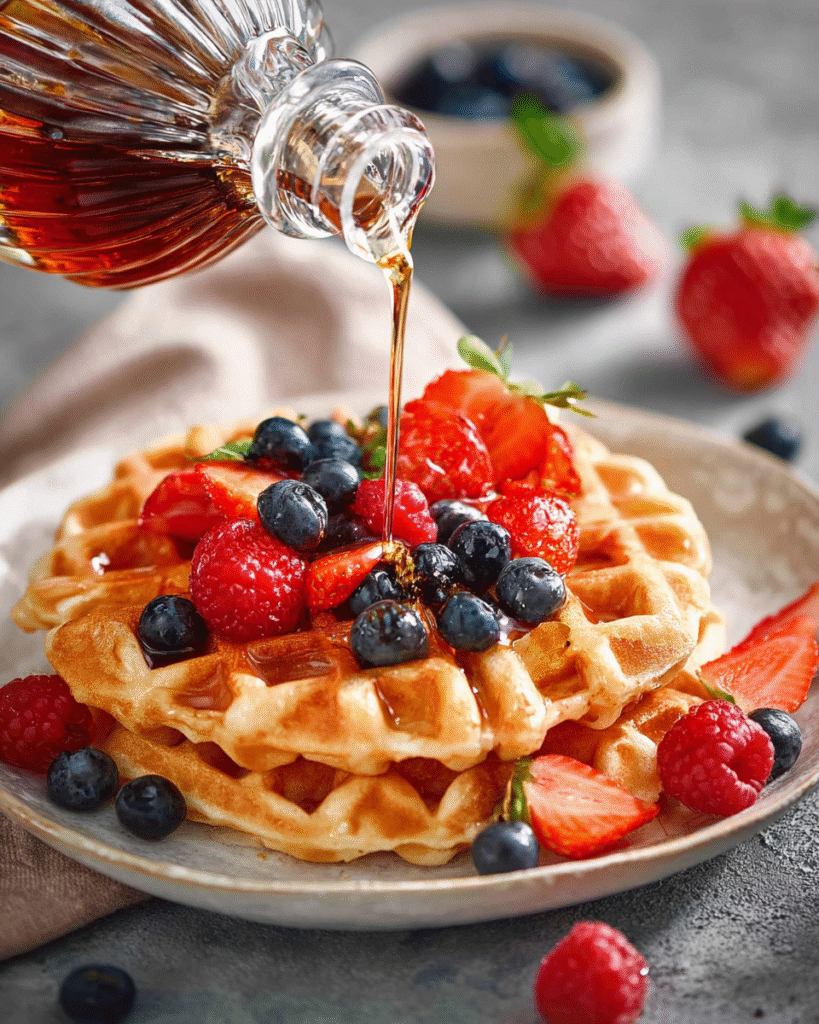
There’s something undeniably magical about waking up to the smell of warm, buttery Fluffy Waffles on a lazy weekend morning. For me, it started as a way to slow down and savor those precious hours between the hustle of the workweek and the start of another busy Monday. Now? It’s a non-negotiable ritual. Golden, crisp edges. Pillowy centers. And that irresistible scent that gets everyone out of bed faster than you can say “brunch.” It’s not just about food—it’s about moments made over maple syrup and second helpings.
Whether you’re feeding a crowd or just want to stock your freezer with weekday waffle happiness, this recipe is a total keeper. I’ve tried more versions than I can count, and trust me—this one hits all the marks. It’s as easy as your favorite pancake mix but tastes like a cozy weekend hug. Oh, and if you’ve ever struggled with waffles turning soggy or sticking, don’t worry—I’ve got your back with all the tips. (Also, if you’re into breakfast baking, check out this list of best brunch recipes for busy mornings—a goldmine of cozy kitchen inspiration.)
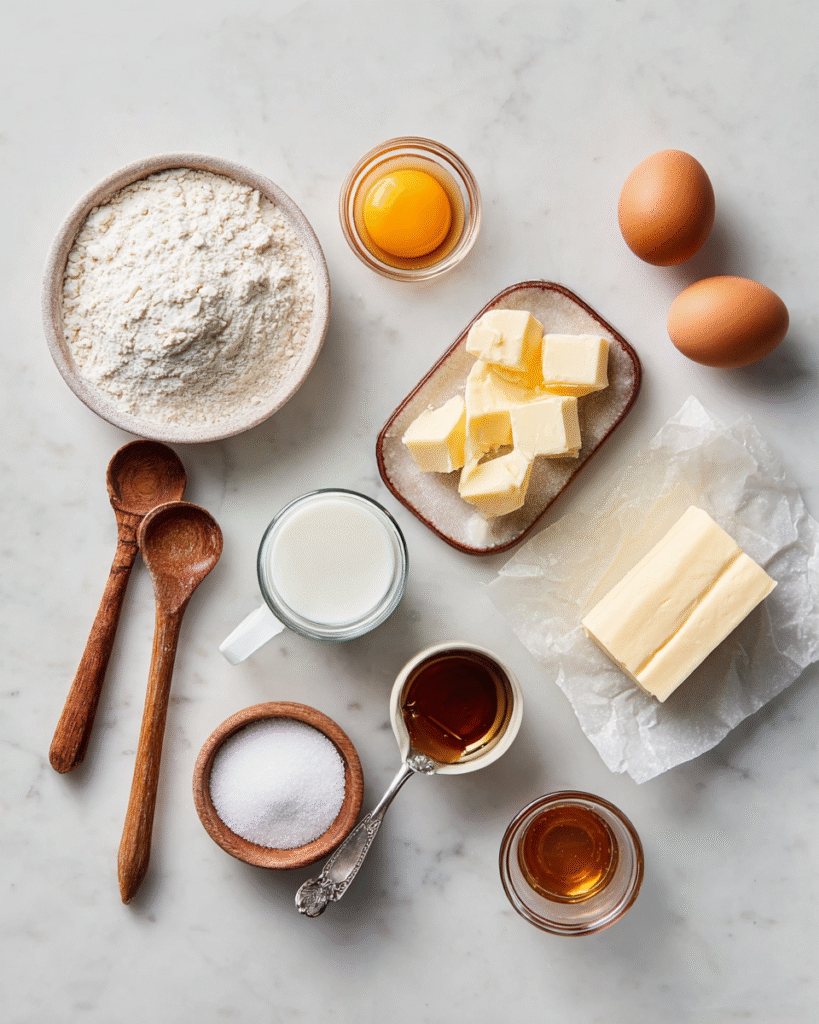
Dry Ingredients
- All-Purpose Flour (2¼ cups)
This gives your waffles structure. For the best texture, spoon the flour into your measuring cup and level it off—don’t scoop directly from the bag or you’ll end up with heavy waffles. - Granulated Sugar (¼ cup)
Adds just the right touch of sweetness without making them dessert-level sweet. Helps with browning, too. - Baking Powder (1 tbsp)
The key to fluffy waffles! This leavening agent gives them that light, airy texture we all love. - Salt (¾ tsp)
It might seem minor, but it sharpens the flavor and balances the sweetness beautifully.
Wet Ingredient
- Milk (2 cups)
Whole milk is ideal for richness, but 2% works well too. Room temperature milk blends better with melted butter and eggs. - Unsalted Butter, Melted (½ cup)
This is where the magic happens. Butter adds unbeatable flavor and gives your waffles that golden crispiness. Make sure it’s cooled slightly before mixing in. - Large Eggs (2)
Eggs bind everything together and add to the richness. Bonus tip: Let them come to room temperature for a smoother batter. - Vanilla Extract (2 tsp)
This little addition brings warmth and bakery-style depth to your waffles. Don’t skip it!
How to Make the Best Fluffy Waffles
Ready to bring your weekend waffle dreams to life? This step-by-step process will walk you through everything—from prepping the batter to pulling those golden beauties off the waffle iron. And don’t worry—I’m keeping it warm, detailed, and totally doable.
Step 1: Preheat That Waffle Iron
Before anything else, plug in your waffle iron and let it heat up completely. If your iron has a “crispness” setting, medium-high or dark is ideal for that golden crunch. A hot iron is key to a crispy outside and fluffy inside.
Step 2: Mix Your Dry Ingredients
In a large bowl, whisk together the all-purpose flour, granulated sugar, baking powder, and salt. Take a moment to enjoy the ritual—flour puffing into the air and the soft sound of whisking feels like the start of something cozy.
Step 3: Whisk the Wet Ingredients Separately
In another medium bowl, combine the milk, melted butter (make sure it’s not piping hot), eggs, and vanilla extract. Whisk until it’s smooth and creamy. You’ll notice the vanilla gives off that warm, comforting scent—it’s the preview of what’s to come.
Step 4: Combine Wet & Dry—But Don’t Overdo It
Pour the wet mixture into the dry ingredients and stir gently with a spatula or wooden spoon. Stop when just combined; a few lumps are absolutely fine (they help keep the batter light and fluffy). Overmixing leads to dense waffles—trust me, I’ve learned the hard way.
Step 5: Grease and Pour
Lightly grease your waffle iron with non-stick spray or a pastry brush dipped in oil. Scoop about ⅓ to ½ cup of batter into the center, then close the lid and let the magic happen.
Step 6: Cook Until Golden
Each waffle iron is a little different, but most take about 3 to 5 minutes. Listen for the sizzle and peek when the steam slows down. You’re aiming for golden edges and a firm center.
Step 7: Keep Them Crispy
This part matters! Don’t stack your waffles as they come off the iron—they’ll steam and go soft. Instead, place them on a wire rack or a baking sheet in a 200°F oven to keep warm and crispy until serving.
Flavor Twists, Storage Tips, & Waffle Hacks
Once you’ve mastered the basic waffle, the fun really begins. Waffles are the ultimate canvas for creativity, and this recipe is super flexible. Whether you’re in the mood for a cozy flavor upgrade or need ideas for storing leftovers (if there are any!), this section is packed with useful tips and tasty variations.
Flavor Upgrades & Mix-Ins
- Chocolate Chip Delight
Fold in ½ cup of mini chocolate chips right before cooking. They melt into gooey pockets of joy. - Cinnamon Swirl
Add 1½ teaspoons ground cinnamon to the dry mix, or swirl in a quick cinnamon-sugar butter before closing the lid. - Zesty Citrus Boost
Add 1 tablespoon of orange or lemon zest for a bright, refreshing twist—perfect for spring brunches. - Berry Bliss
Toss a handful of blueberries or raspberries into the batter or directly onto the waffle once it’s in the iron. - Savory Style
Skip the sugar, add shredded cheddar, chopped scallions, and a pinch of black pepper for a savory breakfast spin.
Optional Ingredients to Try
- Buttermilk
Swap out regular milk for buttermilk for extra tang and tenderness. Just reduce the baking powder slightly (to 2 tsp) and add ½ tsp baking soda. - Almond or Oat Milk
Great for dairy-free folks! Stick to unsweetened and expect a slightly lighter texture. - Whole Wheat Flour
For a heartier bite, use 1 cup whole wheat and 1¼ cups all-purpose. It adds fiber and a nutty flavor.
Storage & Freezing Tips
- Refrigerator:
Store leftovers in an airtight container for up to 3 days. Reheat in a toaster or oven to revive that crispiness. - Freezer-Friendly:
Let waffles cool completely, then freeze in a single layer before transferring to a zip-top bag. They’ll keep for up to 2 months. - To Reheat:
No need to thaw! Just pop them in the toaster or oven at 350°F for 5–10 minutes until warmed through and crisp again.
Waffle Hacks for Next-Level Brunch
- Double Batch It:
Always make more than you need. They freeze beautifully and future-you will thank you on a busy morning. - Warm Syrup = Happy Faces:
Warm your maple syrup before pouring. It seeps into every waffle pocket like a dream. - Crispier Crusts:
Leave the waffles in the iron for an extra 30 seconds after the light goes off. Game-changer.
How to Serve These Waffles Like a Pro
Sure, waffles straight from the iron with a drizzle of syrup are delicious—but why stop there? If you want your breakfast to look Pinterest-perfect (and taste just as amazing), let’s talk toppings, pairings, and presentation. These tips will turn a simple breakfast into a swoon-worthy brunch spread.
Classic & Cozy Combos
- Maple Syrup + Butter
Sometimes, simple is best. Let the butter melt into every nook and cranny, then top it with warm maple syrup for a nostalgic, soul-hugging combo. - Whipped Cream + Berries
Fresh strawberries, raspberries, or blueberries with a dollop of whipped cream feels like a summer brunch café treat—no reservation required. - Nutella + Bananas
Spread a little Nutella on warm waffles and top with sliced bananas. Finish with a sprinkle of powdered sugar for that dessert-for-breakfast vibe. - Yogurt + Honey + Granola
Want a slightly lighter option? Try Greek yogurt drizzled with honey and sprinkled with crunchy granola.
Savory Serving Idea
- Fried Chicken + Hot Honey
For a Southern-inspired twist, top waffles with crispy fried chicken and a drizzle of hot honey. Salty, sweet, and spicy in every bite. - Eggs & Avocado
Think avocado toast… but better. Top your waffle with mashed avocado, a poached or fried egg, and a pinch of everything bagel seasoning. - Bacon & Cheddar Melt
Add cooked bacon and shredded cheddar cheese while the waffle is still warm. The cheese melts beautifully and bacon adds that smoky crunch.
How to Plate It Beautifully
- Stack It Up
A tall stack of waffles instantly looks more impressive. Add a pat of butter on top and let it melt down the sides. - Serve on a Board
Create a waffle board with small bowls of toppings, syrups, fruits, and spreads. It’s brunch-party-ready and super Pinterest-worthy. - Dust of Elegance
Use a fine-mesh sieve to dust powdered sugar or cocoa powder right before serving. It’s a simple trick that adds visual charm.
Waffle Recipe FAQs
Let’s tackle the most common waffle questions I get—whether it’s your first time making them or you’re looking to level up your brunch game. These answers will help you troubleshoot, customize, and feel confident about every crispy bite.
1. Why are my waffles not crispy?
The biggest culprit is steam! If you stack your waffles right after cooking, the steam softens them quickly. Always place them in a single layer on a wire rack or pop them in a 200°F oven to keep them warm and crisp. Also, make sure your waffle iron is fully preheated before cooking each batch.
2. Can I make the batter ahead of time?
It’s best to cook the waffles immediately after mixing the batter, as the baking powder starts activating right away. However, if you need to prep ahead, mix the dry and wet ingredients separately and combine them just before cooking. You can also cook and freeze the waffles ahead; see the freezer tips above.
3. What’s the best way to reheat frozen waffles?
Skip the microwave—it’ll make them soggy. Instead, pop frozen waffles straight into the toaster or warm them in a 350°F oven for 5–10 minutes. They’ll come out crisp and delicious, just like fresh!
4. Can I make this recipe dairy-free or gluten-free?
Absolutely! For dairy-free, use almond milk or oat milk and swap butter for melted coconut oil or vegan butter. For gluten-free, use a 1:1 gluten-free baking flour blend—just make sure it includes xanthan gum for structure.
5. My waffles are sticking to the iron—what gives?
Make sure your waffle iron is nonstick and well-greased before each use. A quick spritz of cooking spray or a brush of oil goes a long way. Also, avoid opening the iron too soon; wait until the steam mostly subsides and the waffle pulls away easily.
6. Can I double or halve the recipe?
Yes to both! This recipe doubles beautifully if you’re feeding a crowd (or want leftovers), and you can halve it just as easily for a smaller batch. Just keep the ratios consistent and you’re good to go.
Final Thoughts + More Brunch Inspiration
Waffles aren’t just a breakfast food—they’re a mood. A vibe. A sweet little reminder to slow down, gather around the table, and savor something homemade. Whether you’re serving them up for a quiet Sunday morning or turning them into the centerpiece of a brunch party, this recipe is the kind that brings people back for seconds (and thirds).
And if you’re loving the idea of cozy, crowd-pleasing breakfasts, you’ll want to explore more ideas like these easy make-ahead brunch recipes that save time and impress guests. There’s something magical about knowing you’ve got a few go-to recipes that never fail.
Print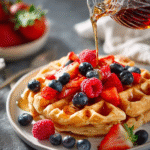
Crispy, Fluffy Homemade Waffles You’ll Crave Every Weekend
- Total Time: 25 minutes
- Yield: 6–8 waffles 1x
Description
These homemade waffles are golden, fluffy, and perfectly crisp. Whether you’re cooking up a cozy weekend breakfast or stocking the freezer for busy weekdays, this easy waffle recipe will quickly become a household favorite. With simple ingredients and lots of tips, you’ll get waffles that are better than any box mix—every time.
Ingredients
2¼ cups all-purpose flour
¼ cup granulated sugar
1 tablespoon baking powder
¾ teaspoon salt
2 cups milk
½ cup unsalted butter, melted
2 large eggs
2 teaspoons vanilla extract
Instructions
Preheat your waffle iron to medium-high.
In a large bowl, whisk together flour, sugar, baking powder, and salt.
In a separate bowl, whisk milk, melted butter, eggs, and vanilla.
Pour the wet ingredients into the dry and mix just until combined (some lumps are fine).
Lightly grease the waffle iron, pour in ⅓ to ½ cup batter, and cook until golden and crisp.
Place finished waffles on a wire rack or keep warm in a 200°F oven.
Notes
Don’t overmix the batter—lumps are your friend.
For crispier waffles, leave them in the iron for an extra 30 seconds.
To freeze: Let waffles cool completely, freeze in a single layer, then store in bags.
- Prep Time: 10 minutes
- Cook Time: 15 minutes
- Category: Breakfast
- Method: Waffle Iron
- Cuisine: American
Nutrition
- Serving Size: 1 waffle
- Calories: 280 kcal
- Sugar: 7g
- Sodium: 310mg
- Fat: 13g
- Saturated Fat: 7g
- Unsaturated Fat: 5g
- Trans Fat: 0 g
- Carbohydrates: 34g
- Fiber: 1g
- Protein: 6g
- Cholesterol: 65mg
Keywords: fluffy waffles, easy waffle recipe, crispy waffles, breakfast ideas